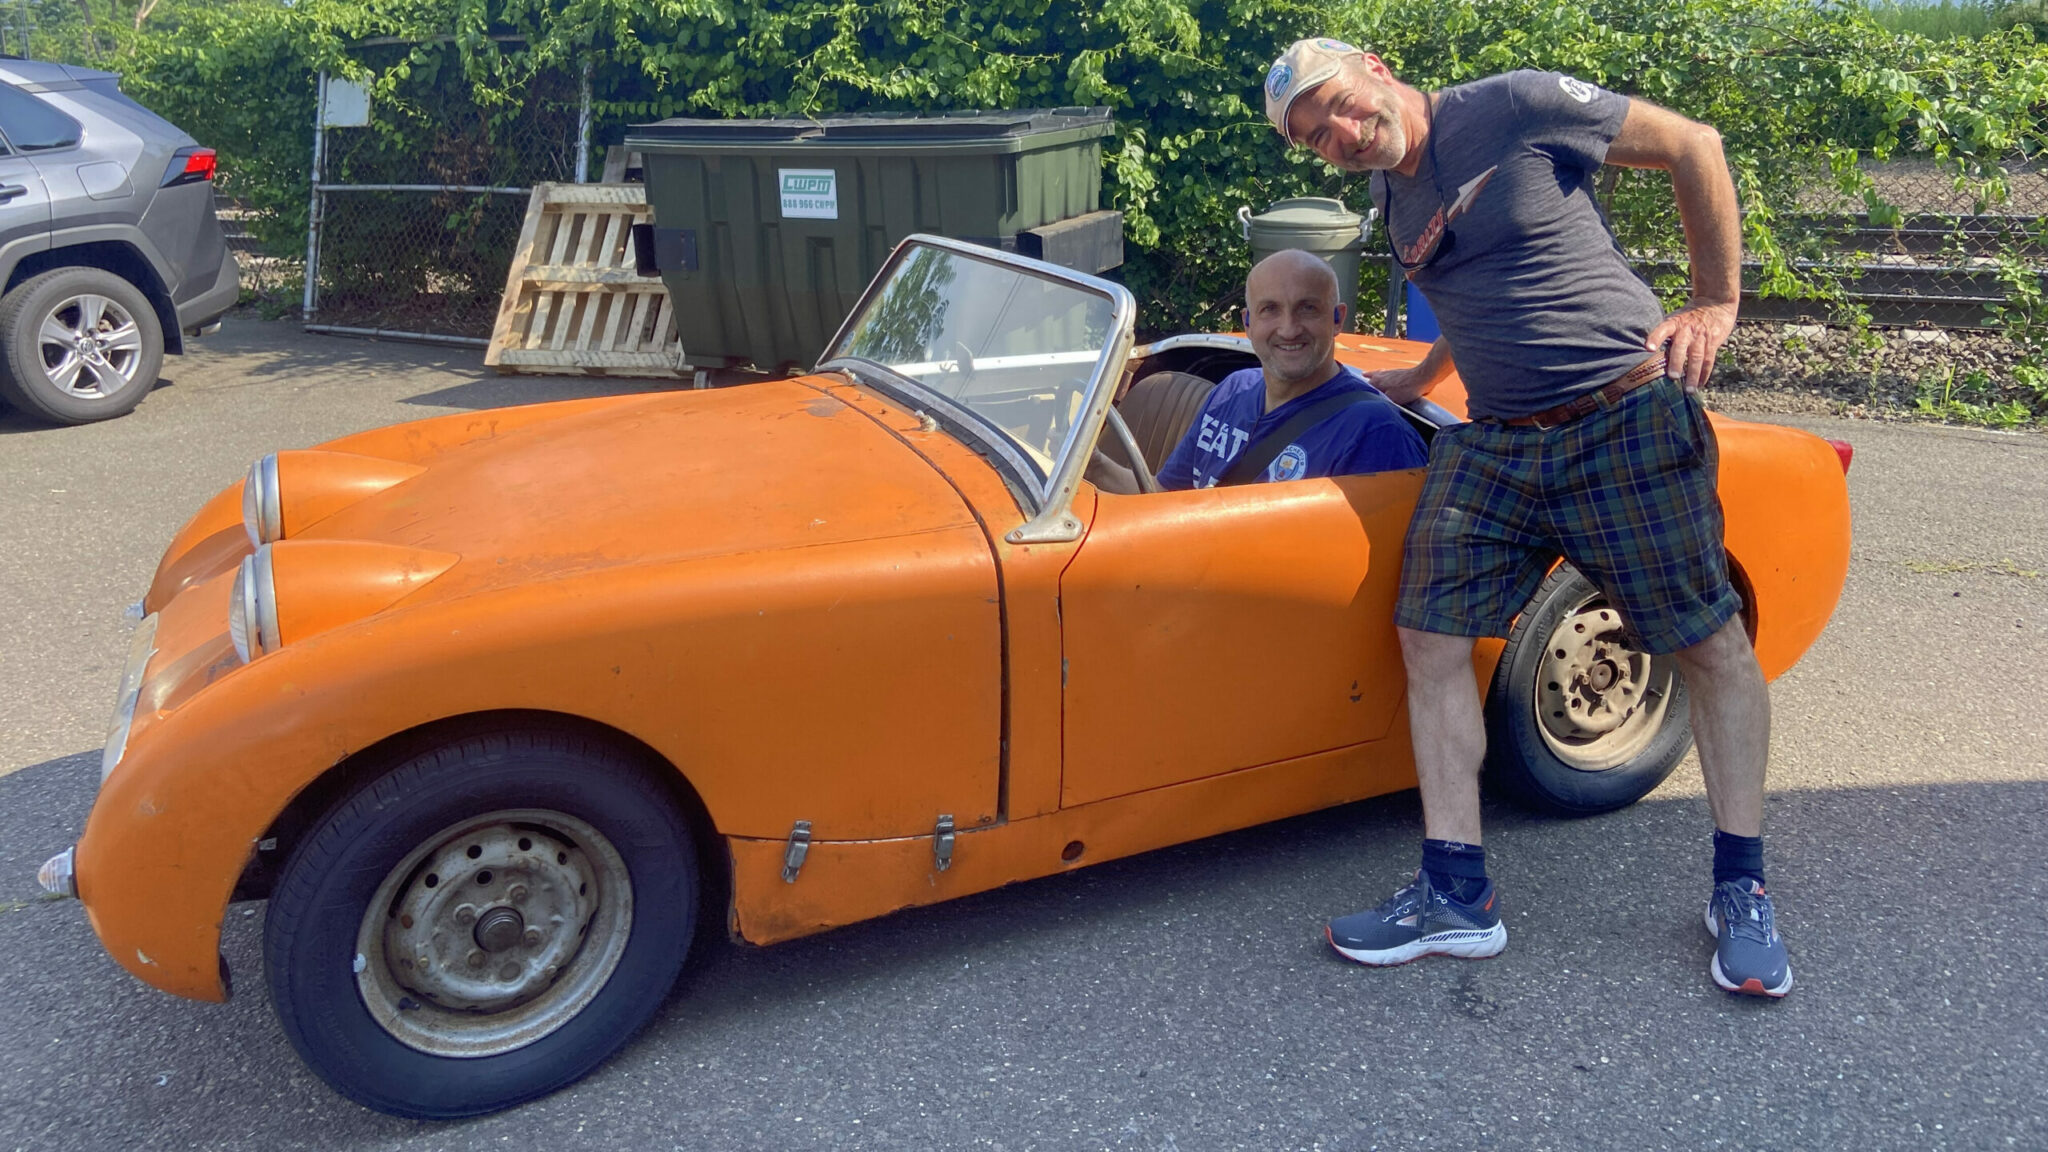
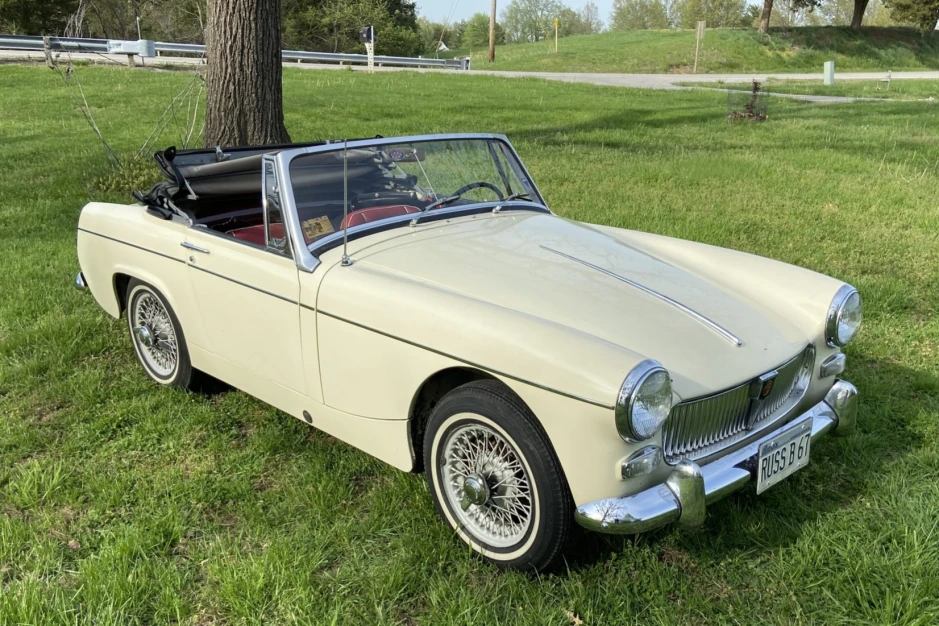
This Bugeye was in rough shape when it arrived here at Bugeyeguys world headquarters, having not seen the light of day in over a decade. We were tasked with mechanically resurrecting this car, which had belonged to a relative, so the current owners could drive and enjoy it and now The Great Pumpkin lives again!
[Read more…] about Bugeye resurrection!Let Bugeyeguys sort your online auction purchase!
2023 will probably be written about as the year that online auctions became an even more massive force in classic car sales. More new online platforms are emerging every month for people to purchase antique cars, sight unseen, while relying on social media to vet their vehicles.
[Read more…] about Let Bugeyeguys sort your online auction purchase!Oil Toil
It seems that no matter how hard we try, every classic English sports car leaks oil. I’ve seen many forum posts over the years where people claim to make a leak-free car, and certainly some of them leak very little, but it just seems inevitable that these old cars will leak, no matter how hard you try. And even if you stop them from leaking, it seems just a matter of time before they start leaking once again.
In this post, I wanted to show you some photos of a particular Bugeye engine that just arrived in our shop. This one is leaking more than usual, and in this case it makes a lot of sense to try to reduce or stop the leaking all together. (We’re always optimistic, but we’re also realistic).
Of note in this case is the head gasket leak. We’ve added ultraviolet dye to this engine, so you see a bright green trace wherever there are leaks (a UV kit makes it easy to see exactly where we have leaks). Take a look at the green trace on the left side of the engine. This is directly in line with the oil galley that feeds the head up through the rocker arm pedestal, and the oil as it travels from the block up to the head sometimes leaks at this location. Unfortunately, once it starts leaking, you have to change the head gasket.
We will remove the head to inspect. it could be a bad head gasket or the head is not flat (or block) or too much combustion pressure with an excessively high compression ratio, for example. Or maybe the oil pressure relief valve is not working or set too high… these are all things we will investigate when we get the engine out of the car.
[Read more…] about Oil ToilThe shortest distance between two points
Bugeye tachometers (and their drivelines) often break. (So does any mechanically driven tachometer on any old British car). This continues to be one of the more annoying recurring problems that we end up having to sort. This week, we had a failure in the field from one of our customers and I thought we would use this as a teaching opportunity so that we can all try to make these kooky systems work more effectively in the future.
We haven’t seen this car (just photos), but there are a number of causes that could be at play here, because you have a chain of springs and sprockets trying to translate information from the generator all the way to the tachometer, and if any piece in that chain is not up to code, you can have a failure such as what you see pictured here. This particular tach drive exploded (which doesn’t happen often) but we have a few thoughts as to why this occurred. Note that it was operational in the field for almost eight months (since October of 2022) and had about 200 miles before it exploded.
The first thing that can fail is the tach drive itself. Often these are not well-lubricated, especially if it is an older unit that has been installed for a long time. It’s a good idea to take yours apart and fill it with red grease. It’s very easy to do; most tach drive gearboxes (except for early cars) have two small fasteners holding the two halves of the box together, and separate easily so you can pack the box with grease. This should be a part of your routine maintenance schedule. It’s recommended that you should do this once every five years or so. But I don’t think that’s related to why this particular drive failed, as it was a brand new gearbox that was only about eight months old.
The bigger issue seems to be with the interface between the cable and drive . You need to make sure that the cable doesn’t protrude too deeply into the tach gear box because when you tighten the knurled ring, you’ll be putting great deal of force on that inner Cable.
This force can bend the cable end and cause it to make a concentric arc with each revolution, which adds stress to the system; if the NTSB was at the scene of this failure, I would guess their findings would suggest an overtightened knurled ring on a cable the protruded too far into the tach drive. We suspect over tightening because we see a damage on the knurled ring, perhaps from (over) tightening with large channel pliers.
It’s also important to inspect the interface between the tach drive and the generator. We also need to make sure that this junction does not protrude excessively into the generator, and also that the two units mate neatly. Sometimes you need a spacer to support the tach drive in the generator, so it’s worth looking at this mating point.
In the case of this particular tach drive explosion, you can also see a nick on the brass nut, indicating that it was also tightened aggressively, perhaps too aggressively. That can become a problem when there is a void between the tach drive inner spindle and the end of the tach drive inside the generator. Here’s where it’s sometimes helpful to add a spacer, to support the tach drive more effectively.
One other important issue is that the tachometer itself can get gummed up. When this occurs, more torque is required in order to drive their mechanism effectively. If that’s the case, it will stress the cable that is unable to turn the gummy tachometer, and this too can contribute to undue stress on the system, which could lead to an explosion of a tach drive, but more often will lead to the failure of a tach cable. So it’s best to remove your tachometer from the dashboard and actuator to see if it is excessively stiff; you can use the end of an old tachometer cable mounted in a drill to check this. Spin it counterclockwise to see if the gauge is gummy or binding. It might be easier to do this with your fingertips with the nipple rather than to use a drill where you can’t actually feel if the gauge is extra stiff.
So when diagnosing a non-functioning, poorly-functioning, or exploded tachometer circuit, it’s helpful to understand the system as a whole. Of course, we offer electronic tachometers should you want to eliminate the mechanical link altogether, or if you prefer, you can send us your gummed-up old tachometer to be rebuilt, a service we are happy to provide for you! Call or email for details.
Click the photos below to get the tachometer components you need to get your rev counter back up and running, or click here for our complete catalog!
Door Seal dilemma: How do you fix a Bugeye door seal that has fallen off?
Door seals on Bugeyes aren’t perfect. When installed properly they look great and create a soft barrier between the door and the body of the car, dampening vibrations and aiding in door fitment. Unfortunately, after repeated attempts to enter and exit the vehicle and brushing up against the seal, it can pull away from the body, creating something similar to what you can see in the above photo.
Fortunately, it’s simple to repair this malady, and you can do it from the comfort of your own garage. In the video below, we’ll show you the best way to fix your separated door seal:
[Read more…] about Door Seal dilemma: How do you fix a Bugeye door seal that has fallen off?10,000 supercharger miles and counting! VIDEO
This Bugeye gathers no moss. The owner uses it. A lot.
He got this Sprite in the 70s from his dad, and the car is still in the family all these years later. We fit our Spridget supercharger kit about 10k miles ago, and the car was back this week for a front disk brake conversion, new leaf springs and adjustable control arms, so that we could better align the two front wheels.
Almost every Bugeye has had some form of front end hit or another given the 65 years on the road, so the control arm mounts are often tweaked and no longer true. This car had quite a camber asymmetry, which the adjustable control arms allowed us to iron out.
If you would like your car sorted, or your camber equalized, or your car supercharged, please give a call or send an email. We’ll pick up your car and fix it. You’ll be hitting the 10,000 mile mark in your car in no time!
Check out the video tour above… we prepared the car for its drive back to Boston today. We expect the car will enjoy another 10,000 miles before its next series of upgrades!
If you’d like to install some of the products you’ve seen in this video today, click on the photos below or visit our parts catalog by clicking here!